How to use Microsoft Planner? February 17, 2023 – Take a look at your computer desk area. Your greater workspace, if you will. Are there countless sticky notes with important information strewn about? Sheets of loose-leaf paper with notes and reminders hanging off your desktop computer with a single piece of tape? Is your to-do list on the back of some old envelope? Are you even writing a to-do list?
We don’t want to attack you on this beautiful day, wherever you’re reading this from, but if you’re here and responded like a vampire to garlic at any of the above accusations, it’s probably likely Microsoft Planner can help you get organized and be more productive.
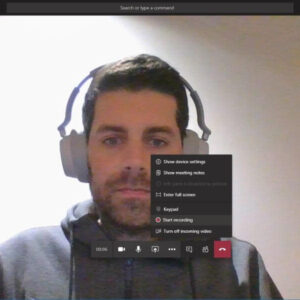
If you are a visual learner, here’s a video starring our CEO, explaining how to manage tasks in Outlook while integrating Planner and To Do with Teams using Microsoft Flows. Yes, we’re here to say Microsoft Planner is a treasure trove of goodies that you should be using in your office to get things done better – and here’s why.
How to use Microsoft Planner?
First of all, Microsoft Planner is an easy-to-use mobile and web application that comes with most paid Office 365 for business subscriptions. That’s right – if you’re here and you’re not already using Planner, it’s very likely being paid for as a part of your subscription anyway.
Using Planner as a desktop or mobile app, you and your team can to develop plans, assign tasks, chat about it all, and view charts of your team’s progress along the way. You can also utilize Planner from inside of Microsoft Teams and Microsoft SharePoint.

How does Microsoft Planner work for my business?
Integrating Planner & Outlook
Microsoft Planner allows you to add tasks from a plan to your Outlook calendar by creating a publishing link. This allows anyone with the link to your specific event or meeting to import it into their Outlook calendar. This feature is great for a team planner, where everyone will be able to see when tasks are due for completion. The good news is, you never have to share this link with anyone (it’s an incredibly long link that no one could ever guess or find by accident), so your Planner data is secure.
This fully automated assistant’s job is to aid you in the decision you likely hate most: What to do today. The lightbulb icon can help suggest tasks from a list, and from there it’s as easy as a right-click to add these activities to your day. If you’re unable to complete your tasks that day, the previously mentioned My Day will automatically save your progress and start you on the right track the next time you log in to work.
Operating the Planner Hub
The hub in Planner is a simple visual dashboard of what’s going on in your organization. It’s the place to see all your plans and visualize what needs to be done in the immediate future. You can highlight important plans at the top by making them “favorites” among some of the other more useful features.
Once created, you can create as many buckets as you want. These buckets will help you better organize your team’s work, no matter how exactly that needs to look to get the job done. Valuable information like who is assigned to what is also at your fingertips while items that are behind are tinted red for easy identification.
As new work is being created in Planner, you will also see the option to add labels. You can edit the labels to be department tags, individualized to people and projects, or even based on the type of task assigned. Whatever your group needs, Planner can flex to help.
Leveraging Tags to Find Files and Information
No, this isn’t the same kind of storage facility as the scene from Raiders of the Lost Ark, but sometimes digging digital files out of storage can feel like that kind of task. But adding tags to files allows your team to become ultra-organized. Hashtags can build task lists, meaning when something is generated it automatically appears on your must-do lists where they are tagged.
And there are tags for every kind of task. Every office and environment is unique, but tags like #Sales #February and #Travel are examples of the simplicity with which the data can be positively leveraged.
Deploying “My Day” to Stay Organized
The “My Day” feature of Microsoft To-Do is the perfect way to organize your day and get more done. A simple yet powerful feature, your team can make detailed plans for every task so that every item gets finished on time throughout the project.
From your Office 365 portal, access Outlook in your browser (desktop users go to the “To-Do” tab in the left and find “My Day”). Clicking on the “My Day” button in the right corner allows you to drag emails from your inbox over to quickly create a task or calendar event based on that email. You can also view your upcoming calendar and To-Do items without leaving Outlook, an easy way to stay on top of your day in real-time, and pull in multiple calendars from Planner or Microsoft 365 Groups.
Receiving Work from Assigned Task Lists
Another easy way to receive and assign work easily is through the Assigned To You list within Planner. On this, rather than being organized by hashtags, all of the work each team member is assigned will appear, ready to be tackled. This streamlines the work assignment process and allows your team to work from anywhere.
How to use Microsoft Planner for Project Management?
Microsoft Project is the ultimate in project management tools but it is also complex and expensive.
If you are not ready to jump into full project management software, you may benefit dramatically from utilizing Microsoft Planner instead.
Planner is simple, easy to use for new users and included in the licensing for Office 365 users.
Many of the project management features required are included in Planner. Features such as progress tracking, task assignment and management and reminders are included.
Keep reading to see how your team can quickly become more productive utilizing the Microsoft Planner productivity boosts!
Above is information about How to use Microsoft Planner? What this Microsoft Planner? that we have compiled. Hopefully, through the above content, you have a more detailed understanding of Microsoft Planner. Thank you for reading our post.